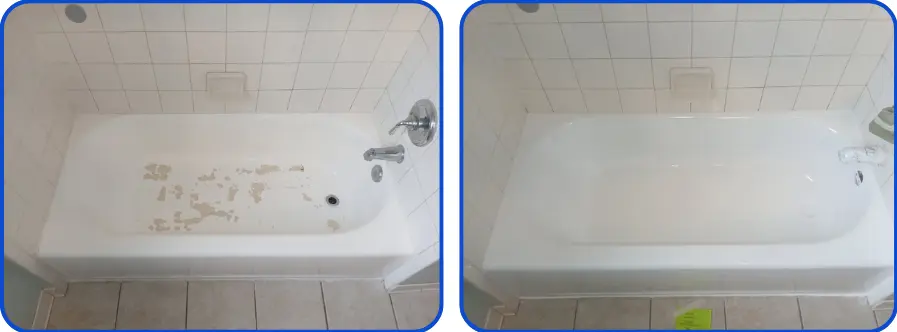
To refinish a bathtub, you move through three phases: prep, coat, and cure. Remove the drain and overflow hardware, cut out old caulk, clean and degrease the surface, etch or sand it dull, repair chips and cracks, mask everything around the tub, spray a bonding primer, apply two or three thin coats of a two-part coating, and keep the tub dry for 24 hours before use. The application typically dries in 2–4 hours, but dry is not cured. Skipping the etch or coating over soap film is the most common way the finish peels in weeks.
For a Jacksonville homeowner, the first real question is not how to spray, but whether the tub is a candidate for this work at all. We have been a trusted name in bathtub refinishing and bathroom restoration in Jacksonville, Florida for over 50 years, and as Jacksonville’s oldest and largest bathtub refinishers, we see the full range of tubs in older neighborhoods like Riverside and Avondale. The decision comes before the prep.
First, decide: refinish, repair, or replace
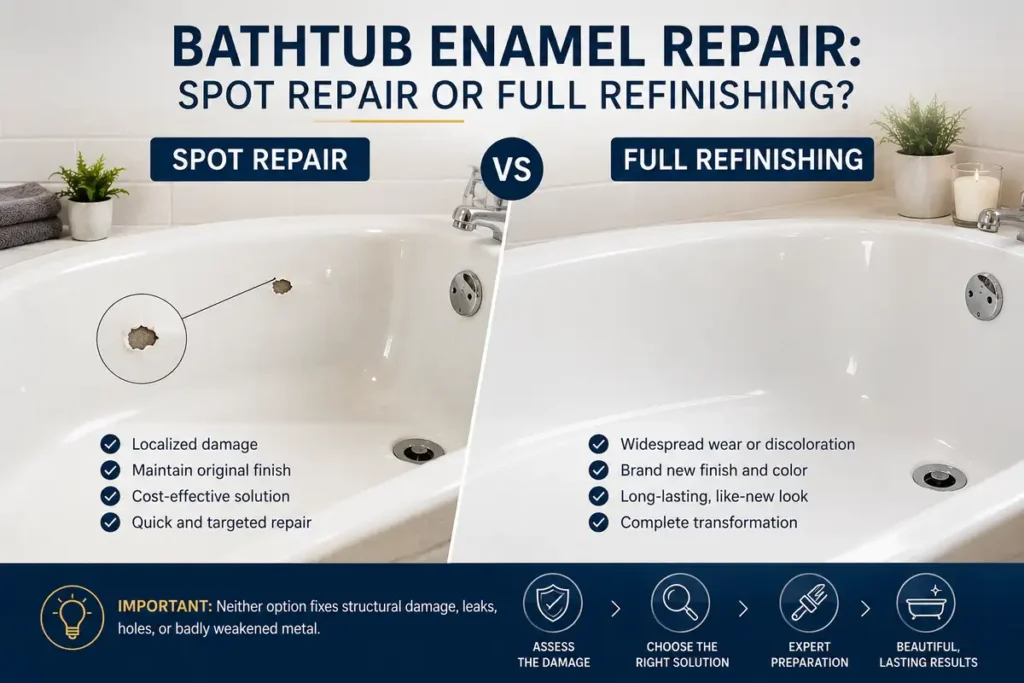
A refinished tub is only as good as the shell underneath it. If the tub is solid, the glaze is worn but not cracked through, and the problem is dullness, staining, or light surface wear, a full reglaze makes sense. If the only defect is one chip near the drain or a single spider crack in a fiberglass corner, a spot repair is often the right size job. If the shell is cracked through, the floor underneath is soft, or the tub flexes when you stand in it, no coating will fix that. In that case, replacement is the only option that holds.
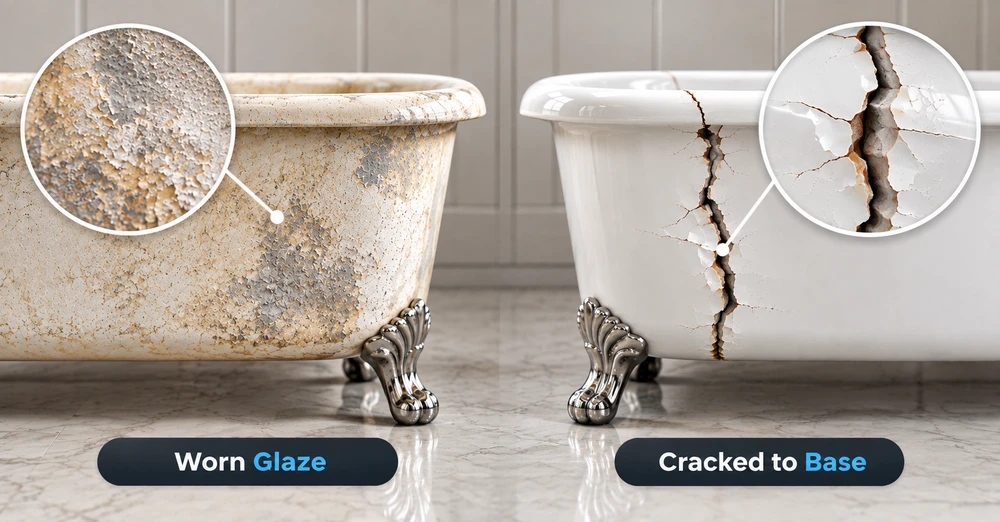
In Riverside and Avondale, many pre-1960 bungalows still have cast-iron tubs with thick porcelain and a worn drain end from decades of standing water. The iron underneath is usually sound. That is a good candidate for refinishing, because the alternative is tearing out tile and plumbing to replace a tub that is not actually failing. You can see what affects the cost of that decision in Jacksonville.
Phase 1: Prep — get to a dull, clean, dry surface
Prep is not one step. It is four or five small jobs that all must be done before a spray gun comes out.
Remove hardware and old caulk. Take off the drain flange, overflow plate, and any soap dish or grab bar if possible. Use a drain key or pliers and go slow. Old brass drains snap before they turn. Then cut the caulk line where the tub meets the tile or floor. A razor scraper and a plastic putty knife work. Pull the caulk away completely. Silicone residue will contaminate the new coating, so this step is not optional. Cover the open drain with masking tape so dust and coating do not pack into the plumbing.
Clean and degrease. Soap scum, body oil, shampoo film, and hard-water scale sit on top of the old surface. If you coat over them, the new finish peels with the film. Scrub the tub with an abrasive bathroom cleaner and a green scrub pad. Work the corners, the drain area, and the underside of the front apron. Rinse thoroughly and dry with lint-free rags. Then wipe the whole tub with a solvent such as denatured alcohol or acetone. Do not use a cleaner that leaves a moisturizer or wax behind.
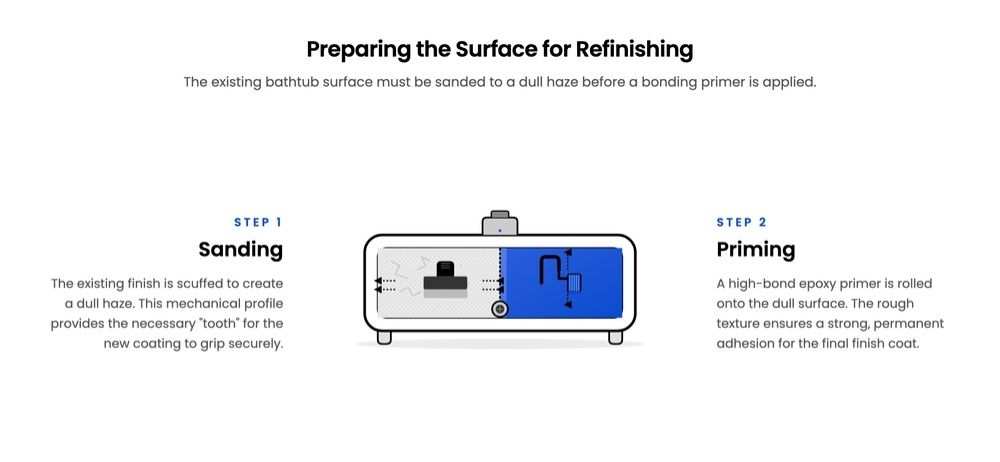
Etch or sand to break the gloss. This is the step most hardware-store kits gloss over. The old surface is slick. The new coating needs something to grip. For porcelain and ceramic, wet-sand with 400-grit wet/dry paper or apply a hydrofluoric acid etch made for tub work. The goal is a uniform dull haze, not deep scratches. For fiberglass and acrylic, sand with 320-grit paper until the shine is gone. In beachfront homes around Neptune Beach or Atlantic Beach, salt air and shower humidity can leave a slight film that slows flash-off, so dry the surface with rags immediately before spraying. Do not skip the etch to save time. A gloss surface will not hold a mechanical bond for long.
Phase 2: Coat — repair, mask, prime, spray
Once the surface is dull, defects are visible. Do not try to hide them under a topcoat.
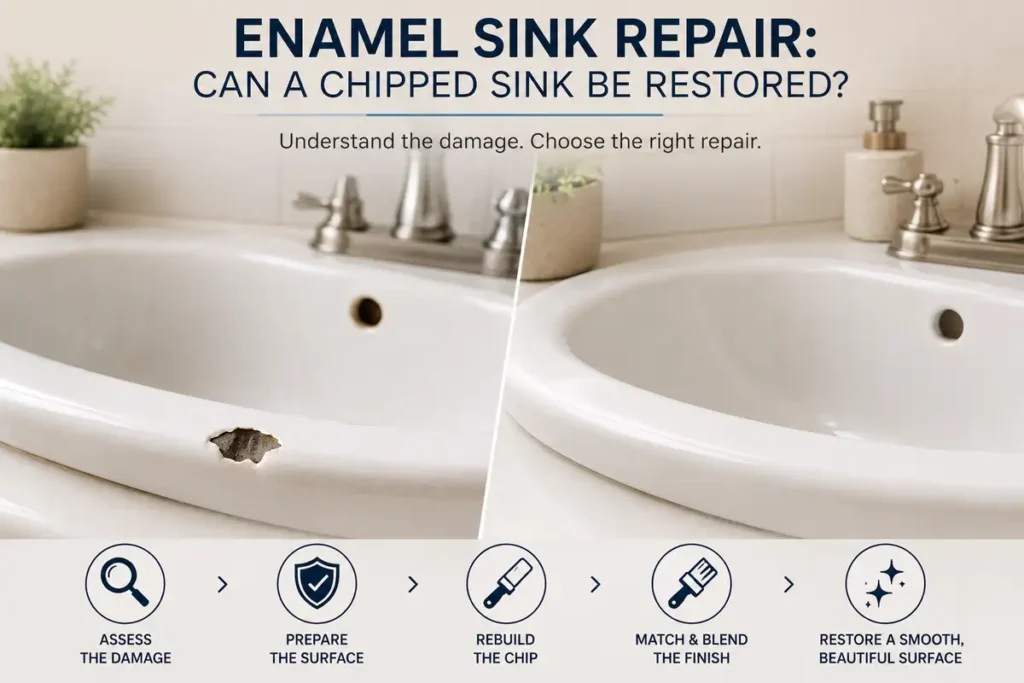
Repair small defects first. Small nicks get filled with a two-part polyester or epoxy filler made for tubs, then sanded flat. Rust spots on cast iron need to be ground or sanded to bare metal, primed with a rust-inhibiting primer, and then filled. A reglaze over active rust will bleed through in months.
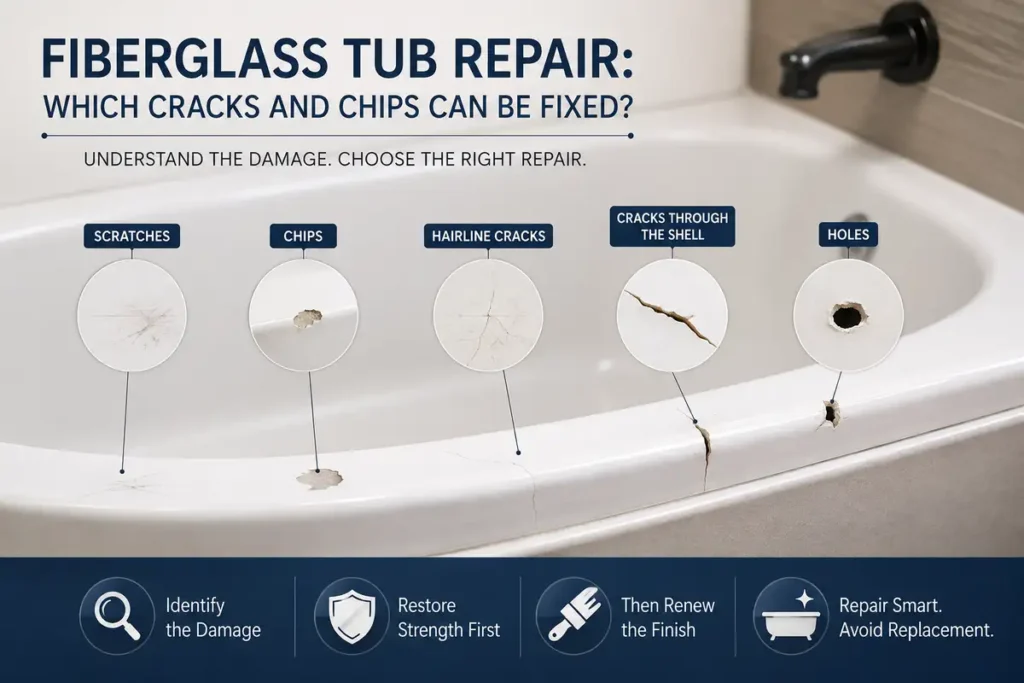
Fiberglass cracks are different. You cannot just fill the line. The crack needs to be ground out into a shallow V, backed with fiberglass mat and resin, and then sanded flush. Without the backing, the flex of the tub reopens the crack right through the new coating. That is why a cracked fiberglass tub needs more than a cosmetic patch. There is more on what a fiberglass crack repair actually involves.
Mask and ventilate. Protect everything that is not being refinished. Mask the walls, floor, faucet, shower valve, and shower door track with plastic sheeting and painter’s tape. Cover the toilet and vanity if they are close. Run an exhaust fan and set up a box fan blowing out a window. The primer and topcoat are solvent-based coatings. Keep the bathroom door closed and warn anyone in the house not to open it during spraying.
Apply a bonding primer. Not every refinishing product requires a separate primer, but a bonding primer made for tub and tile work gives a better grip on old caulk lines, the drain area, and the front apron. Spray one thin, even coat with an HVLP sprayer. A thin coat flashes off in five to ten minutes. You only need enough to create a tie coat between the old surface and the new topcoat. Let the primer flash according to the product data sheet before the first topcoat. Do not let dust settle into it.
Spray the topcoat. The topcoat is a two-part catalyzed coating. Mix only what you can spray in the pot life window, usually 30 to 60 minutes depending on temperature. Spray two or three thin coats, not one thick one. Thin coats flow out and level; thick coats sag and run. Hold the spray gun eight to twelve inches from the surface and move at a steady speed. Overlap each pass by half. Wait ten to fifteen minutes between coats so the previous coat tacks up. You want a wet, even film with no dry spots and no puddles. The coating self-levels best when the room temperature is between about 60 and 85 degrees and the humidity is controlled. In a Jacksonville summer without air conditioning, run a dehumidifier in the bathroom for an hour before you spray.
Phase 3: Cure — patience after the spray
Dust settles on wet coating, so keep the door closed and the fan off for the first two hours. The reglazing application typically dries in 2–4 hours and the tub, sink, or tile can usually be used again in 24 hours. That means a light shower is possible after a day. But the coating is still curing for several days. Do not scrub it, do not set a bath mat on it, and do not use abrasive cleaners for at least five to seven days. The surface is hard to the touch before it reaches full chemical resistance.
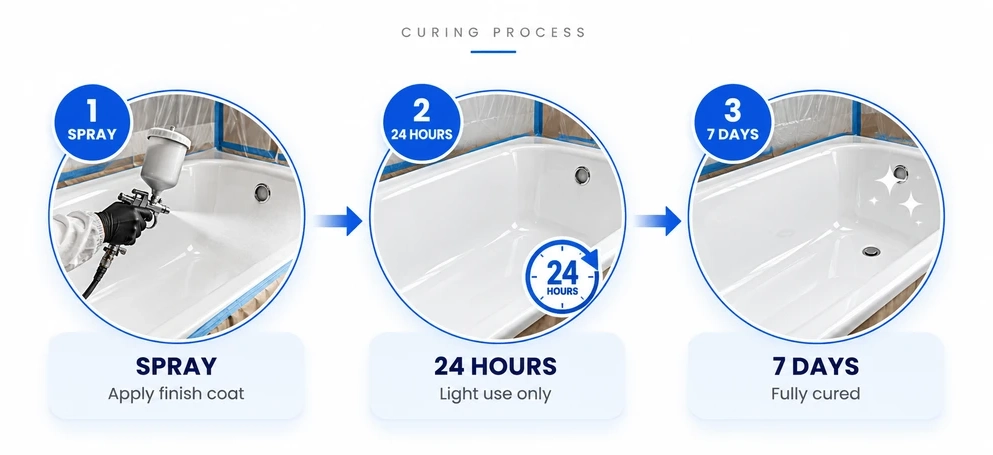
After 24 hours, remove the masking, install the drain flange with fresh plumber’s putty, replace the overflow plate, and run a clean bead of silicone caulk where the tub meets the tile and floor. Use silicone, not acrylic caulk. Acrylic turns brown and peels in the wet area. Let the caulk cure for 24 hours before the first shower if the product calls for it.
Tub and tile are usually one job
In older Jacksonville neighborhoods like Riverside, San Marco, and Ortega, the tub and the wall tile usually show the same wear. If you reglaze the tub but leave cracked or yellowed wall tile, the room still looks tired. Bath Tub Man offers professional tile reglazing in Jacksonville, FL and surrounding Northeast Florida communities. The prep and coating are similar: clean, etch, repair, mask, and spray. When both are done at the same time, the wall tile and tub get one continuous finish without a caulk line between them. There is more on tile reglazing and what it covers.
When a repair is the right size job
Not every worn tub needs a full reglaze. If the only problem is one chip near the drain or a single spider crack in a fiberglass corner, a spot repair can be the smaller job with the same appearance. Check for loose edges, water staining under the crack, and flex before deciding. A full refinishing job makes sense when the wear is spread across the bottom of the bowl, the color is the problem, or the whole surface has gone dull. Bath Tub Man can help restore the look of your tub and give your bathroom a cleaner, fresher appearance without the cost of replacement. There is more on what bathtub refinishing restores.
Common questions
How long will a refinished bathtub last?
With proper prep and a quality two-part coating, a refinished tub in regular household use typically lasts 10 to 15 years before the surface needs attention. The biggest factors are surface prep, coating thickness, and how the tub is cleaned afterward. Harsh abrasives and bleach tablets shorten the life.
Can I use the tub the same day it is refinished?
No. The application dries in 2–4 hours, but the tub should not be used for 24 hours. Even then, keep the first week gentle: no bath mats, no abrasive cleaners, and no scrubbing. Full chemical resistance builds over several days of curing.
Can you refinish a fiberglass tub that has cracks?
Yes, if the cracks are ground out, backed with fiberglass mat, and sanded flat before the topcoat. Filling the crack alone almost always fails because fiberglass flexes. See which cracks and chips can be fixed.
Is refinishing cheaper than replacing a bathtub?
In most cases, yes. Refinishing works on the existing tub and avoids tile work, plumbing, and disposal. The exact cost depends on the tub’s condition and size, which the Jacksonville cost and process guide covers.
If the only problem is one chip or a worn spot near the drain, a spot repair is often the smaller job. For a full refinish on a tub or tile surround in Jacksonville or the surrounding areas, call Bath Tub Man at +1 904-744-3999.